- Menu is at the heart of any application whether it is a desktop application or web application.
- A menu provides a set of options to perform or execute some task or function.
- In a WordPress website a navigation menu provides different links to navigate through the different web pages across the website.
- Normally it is presented as a horizontal bar with clickable navigation links.
It is normally located at header and footer section of the web page. - In this article, we will focus on how to create a menu into WordPress website.
- To create a navigation menu follow the steps given below:
- Login to your WordPress dashboard panel.
- Click on Appearance > >Menu option from the left side panel. It will show you similar screen as shown below.
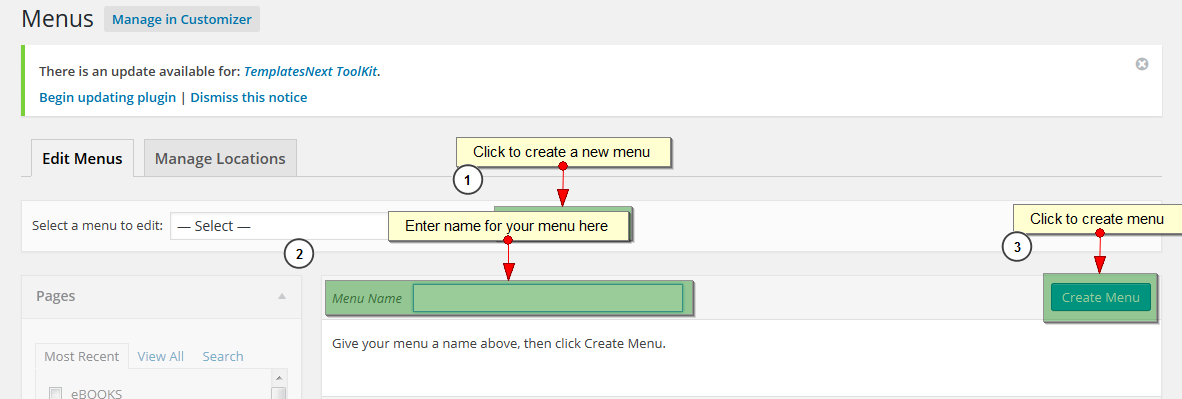
- Click on “create a new menu”
- Enter name for your menu in the TextBox.
- Click on “Create Menu” button and that’s it.
- At this stage, our menu is empty so we have to add navigation link for our web pages inside the menu.
- To add pages into the menu follow the steps given below:
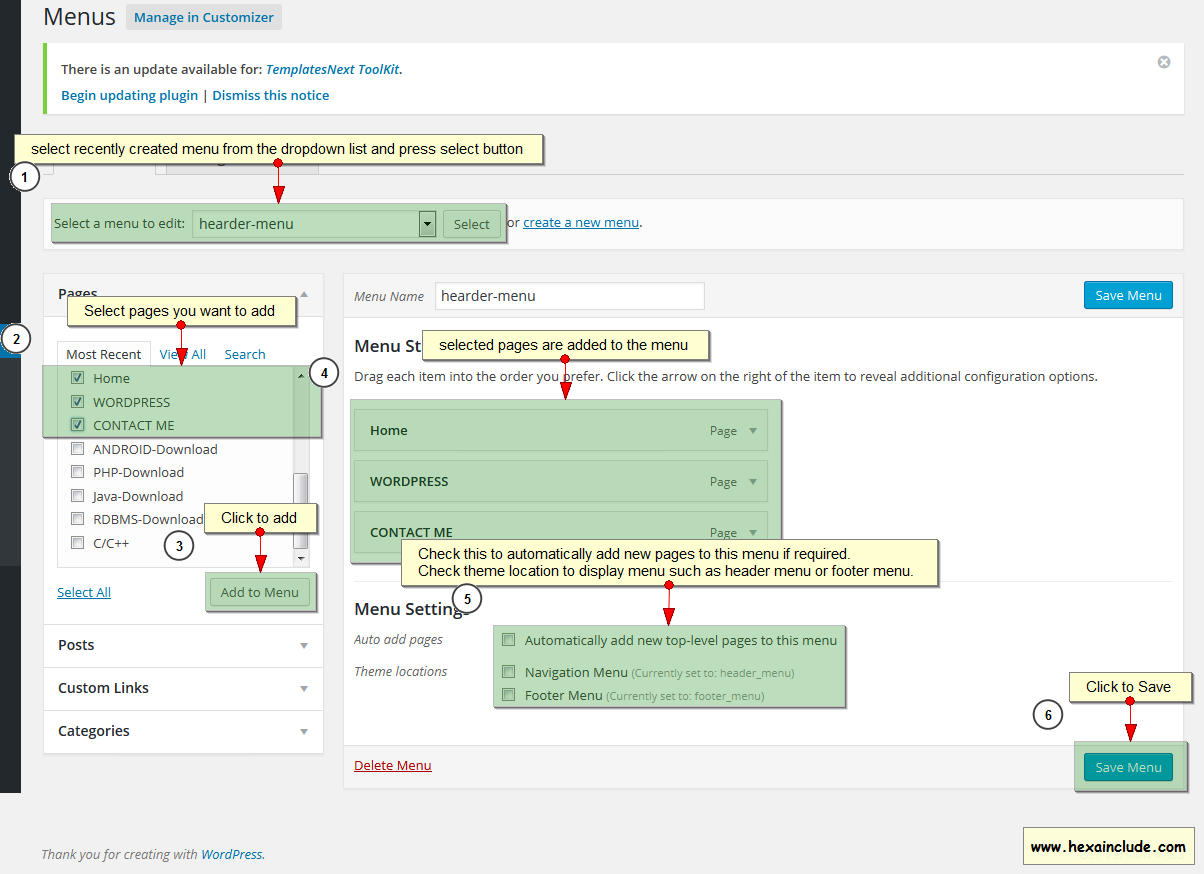
- Select your new menu from the DropDown list as shown in the image and press “Select”
- Select pages you want to add to the menu from the page
- Click “Add to Menu” Now your pages will be appear at the right side panel.
- Click on check box that says “Automatically add new top level-page to this menu” if you wish to add all future pages to this menu.
- Select theme location for your menu to be displayed. Check on Navigation menu ff you wish to use it as header navigation menu or Check footer menu if it will be used as footer menu.
- Finally click on “Save Menu”