- WodPress allows writing post to be displayed on the pages.
- By default post are uncategorized means they do not belong to any specific category.
- We can categorize posts to organize properly.
- Categorized post provides finer control to handle posts based on different criteria and to meet different needs.
- It also helps to navigate on to different posts easily.
- Say for example, we have three different categories such as “Laptop”,” Camera” and “Mobile”.
- So all the post belongs to Laptop will be put inside the “Laptop”
- Similarly, every post related to Camera belongs to the “Camera” category and so on.
- A single post can also belong to multiple categories if required.
- In short organizing your posts into different categories can save you from a great hassle.
- In this article, we are focusing on how to add new category to manage our posts.
- First of all login to your WordPress dashboard if required.
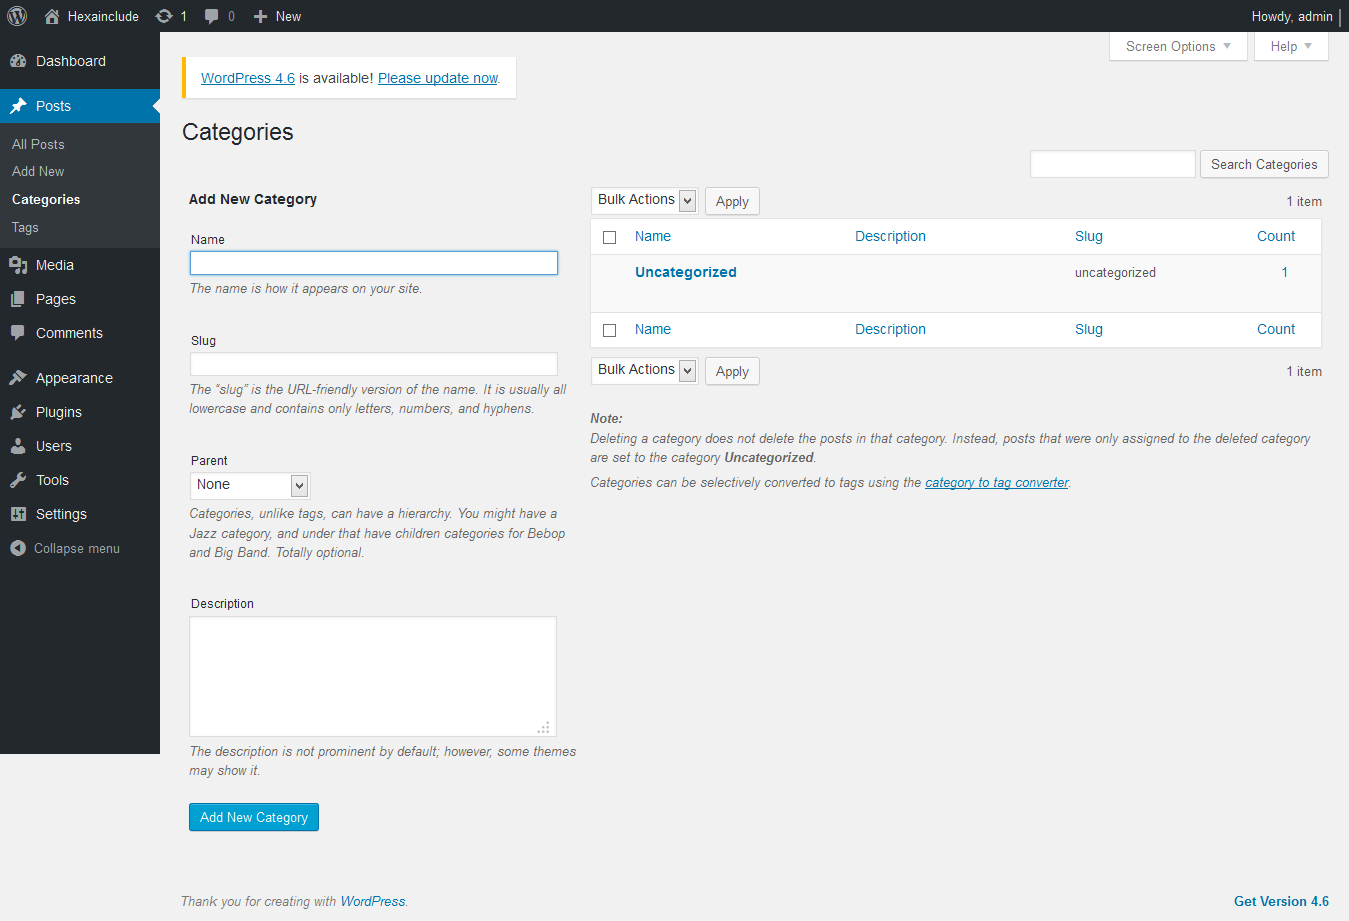
- Click on Posts >> Categories from the left hand side panel and you will be presented with the screen similar to as shown below.
- It shows all the available categories at the right side panel and options to add new category at the left panel. Since we don’t have any category ye, it shows the default one Uncategorized.
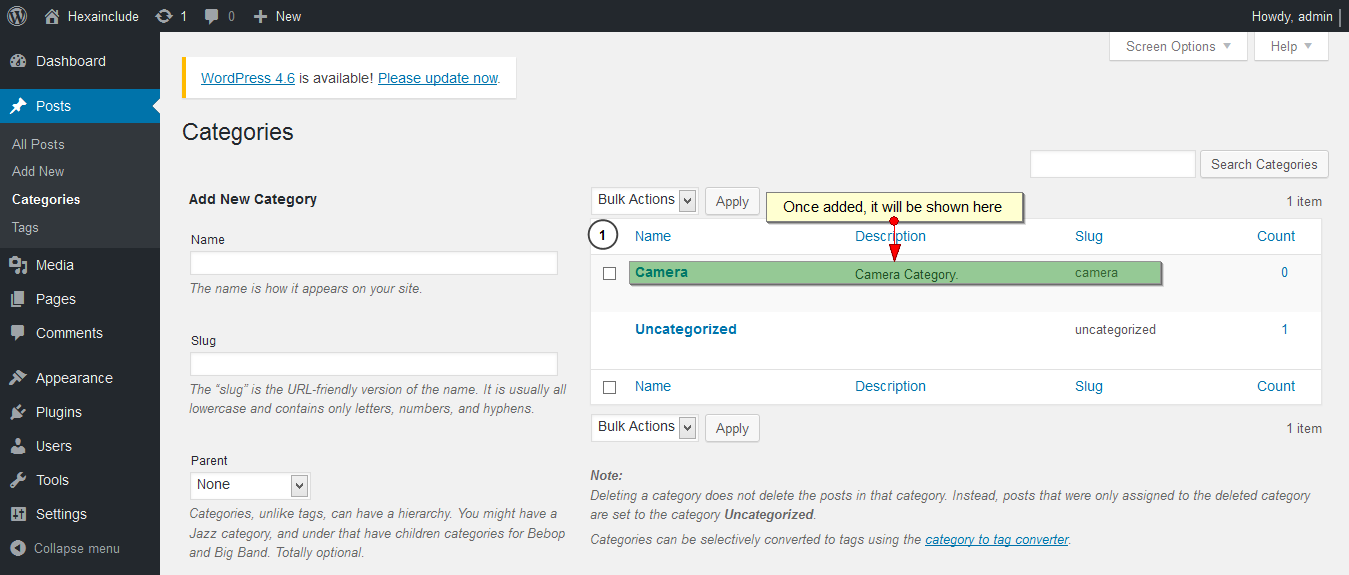
- Once we create categories it will be visible there with category details such as name of the category, description and total available post count for that category.
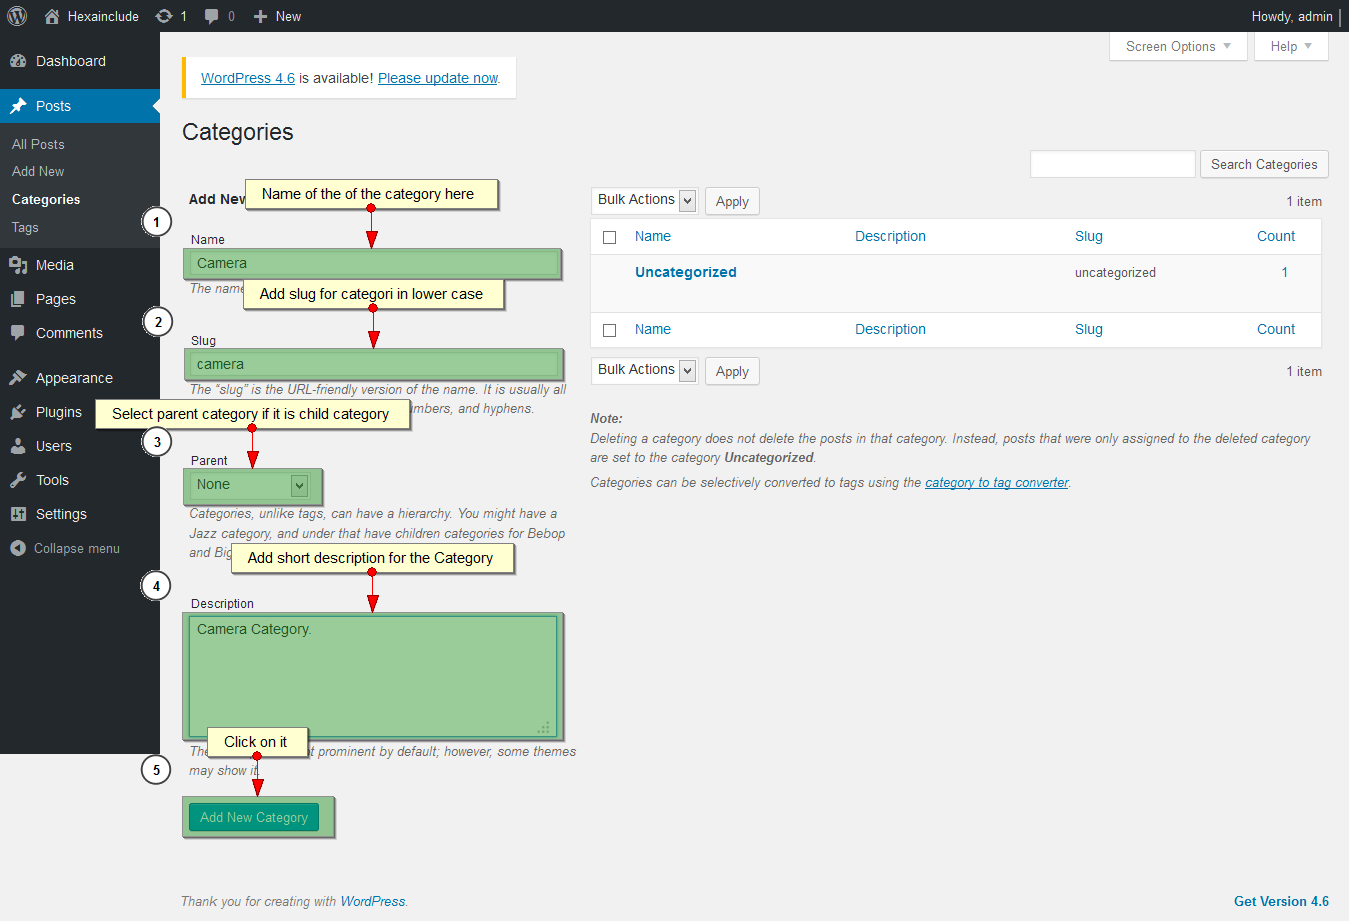
- Now follow the steps as shown in below image to add new category.
- Enter name for a new category. This name will be visible on to the site.
- Enter slug value for the category in lower case.
- Select Parent category from the DropDownList if you wish to make it child category.
- Add description for the category.
- Click on “Add New Category” button. It will show newly inserted category on to the left hand side panel as shown in below image.
- Congratulations! you have added new category successfully!


